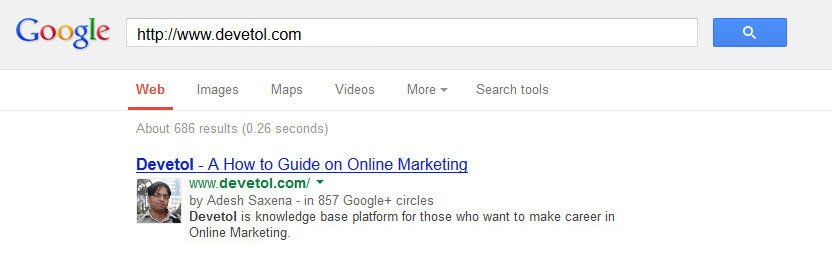
Google Plus authorship is very important for your website. When someone types a keyword in Google Search Box and hit enter button, then it display number of website containing Google Plus Profile Photo along with number of people in his circle.
Follow these steps for Google Plus Authorship:-
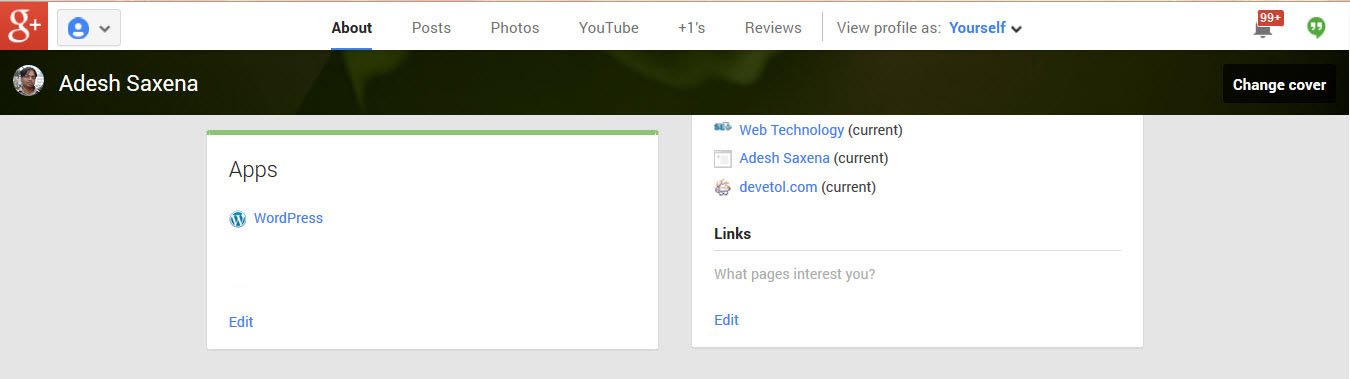
1. Create your Google Plus account with your Gmail ID. Fill all the basic details along with First name and Last name.
2. Add your Profile Photo that you want to display in Search Results. Profile Photo should be clear with recognizable head –shot of you.

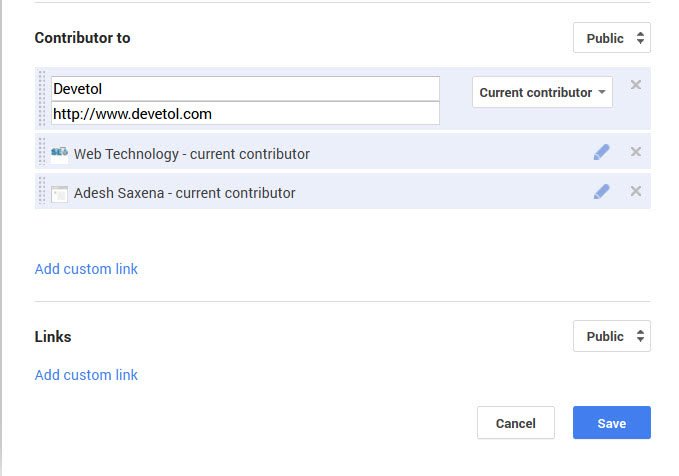
3. Go to About Section of your Google plus profile and Click on Edit under Contributor Option
4. Add website Title and Url in Contributor Section and then Click on Save button.
5. Now Go to Google Plus Authorship Page and in 4th option type your email id of your website i.e., info@domain.com , I have used info@devetol.com. Make sure that you have working email id because you will receive an Email from Google and You have to click on link in order to verify and Complete the Process of Google Plus Authorship. Your name clearly appears on your Web Pages that you write as it identifies that you are the Author.
Another method for Google Plus authorship is to add this code into the <head> section of your site –
<link rel=”author” href=”[profile_url]”/>
Replace [profile_url] with your Google Plus profile URL,
Link will display as :
<link rel=”author” href=”https://plus.google.com/Your G+ ID”/>
You can check your authorship status though Google Structured Data Testing Tool. Type your website Url and Click on Preview button. If your Google Plus Photo appears before the Results then you have successfully Complete Google Plus Authorship Process.

All done wait for few days and Google plus profile will display in Google Search’s Results.
Grow your brand with Devetol Advertising! We specialize in digital marketing solutions. Visit Devetol.com for a free consultation. SEO , Social Media, PPC, Content Writing PR, Digital Advertising, Web Marketing Leads, PR